Hello Opalstackers!
This is a general guide on how to set up an Opalstack hosted email on the latest Outlook. The usual issue here is that our mail servers authenticate using a mailbox username, while the latest version of Outlook appears to require an email address for authentication when you start it up. The only way to bypass this obstacle (as far as I know) is to manually configure a mail profile, as described below.
Note: the Outlook app used for this guide was obtained via the Microsoft 365 subscription, so other version steps may vary slightly. This is also NOT related to the online outlook.com email client.
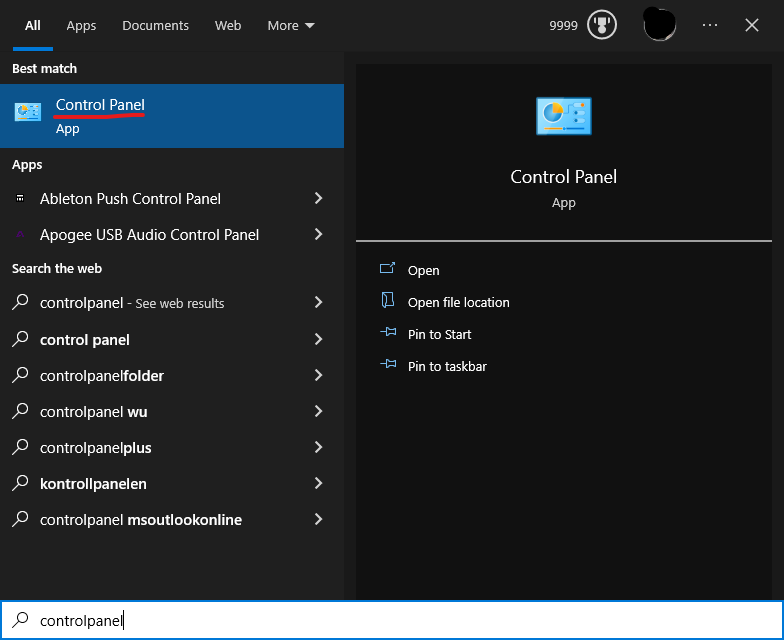
Open the Windows start menu, search for, and open the Control Panel.
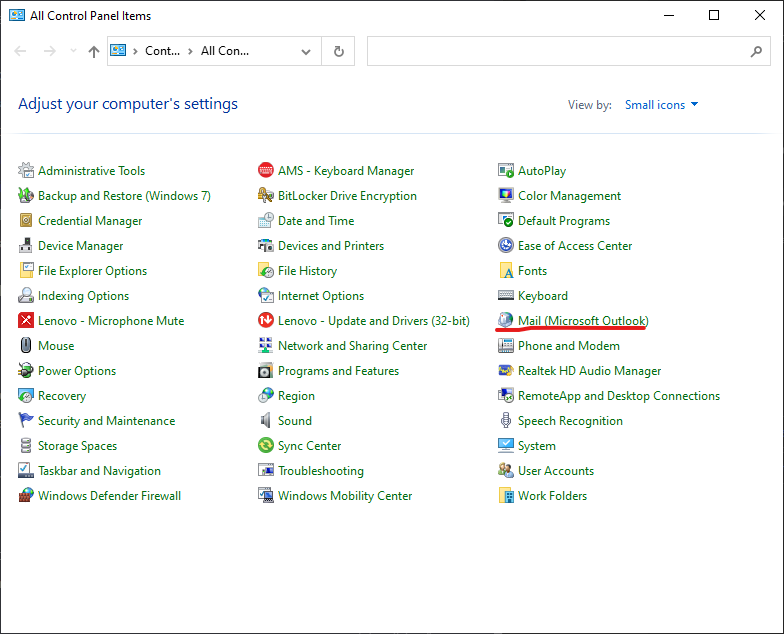
Open Mail (Microsoft Outlook) from the Control Panel window.
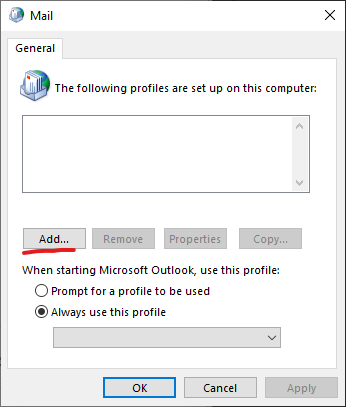
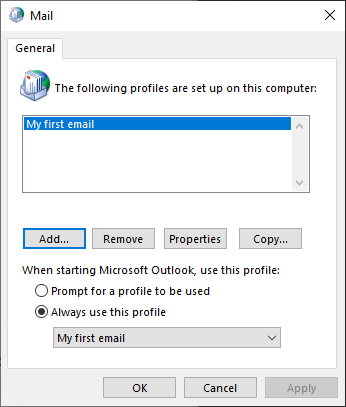
In the new Mail window, you may have other profiles here that you can manage, but we will focus on creating a new profile to associate with a new email address that has NOT been setup before on this device. Therefore, click add.
Note: If you are adding more than one email, it might be useful to select the "Prompt for a profile to be used" option before proceeding, so you can switch between them more easily.
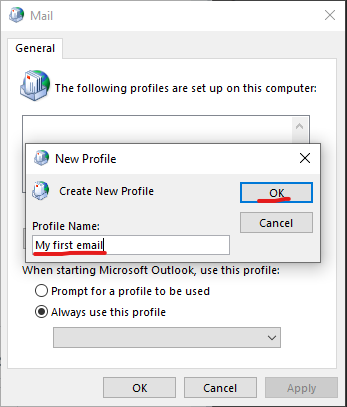
Name the profile in the popup and proceed.
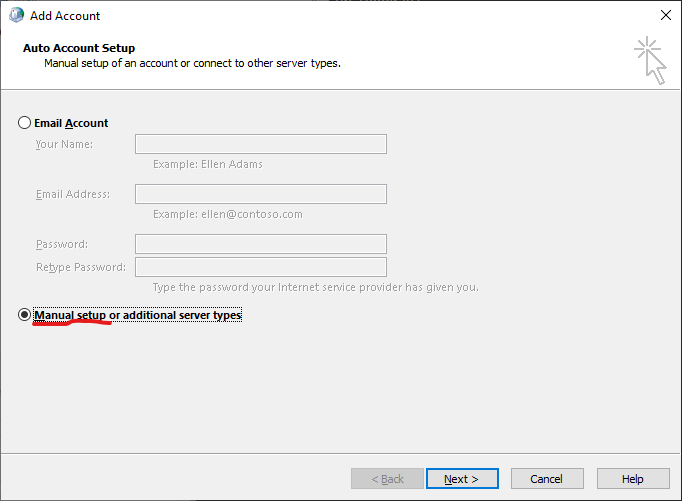
In the next window, select the manual option and proceed.
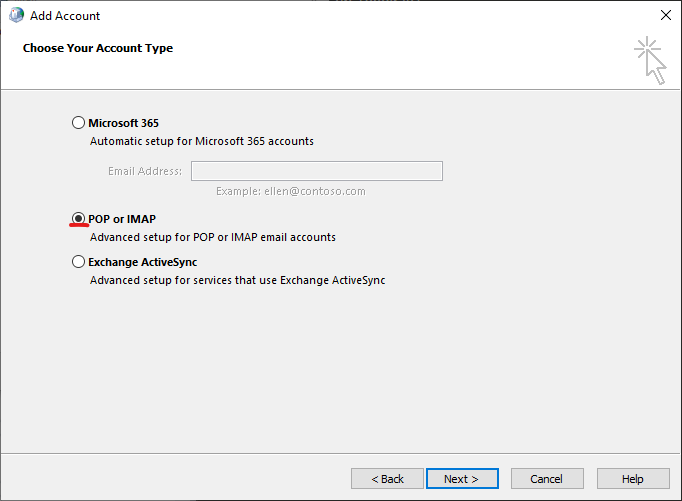
In the following window, select POP/IMAP and proceed.
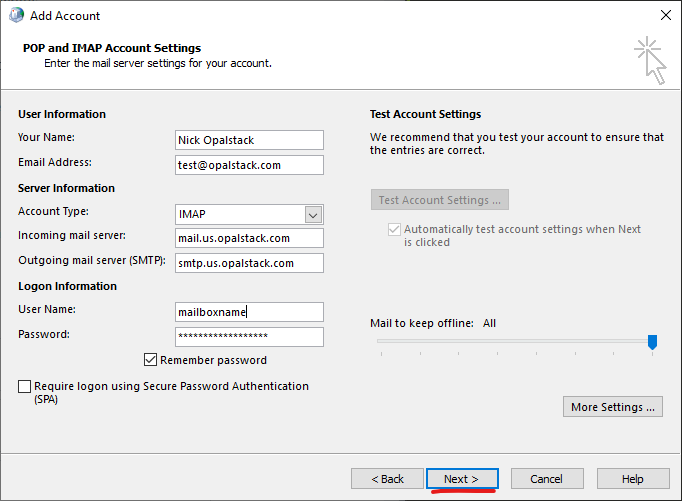
In this window, carefully enter all your email authentication details. We also generally recommend IMAP over POP unless you know you need to use POP. The Username should be the mailbox name you have assigned to the email address in your Opalstack dashboard for that email.
Note: Set your own details for Name, Email, Username, and Password. The Server information will vary depending on your mail server location (check our Email Client Configuration, here).
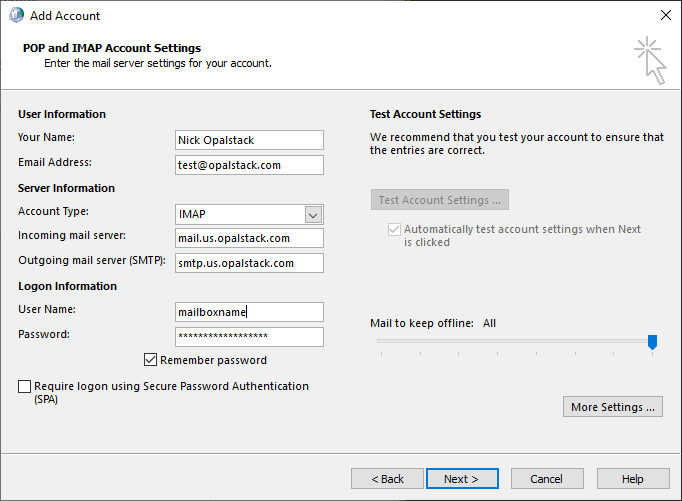
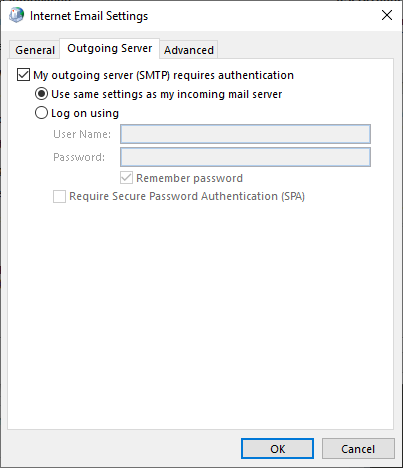
Now, from here, you need to first click on "More settings" BEFORE moving on. After clicking that, go to the Outgoing server tab in the new window and make sure the outgoing server settings are set as I have them below.
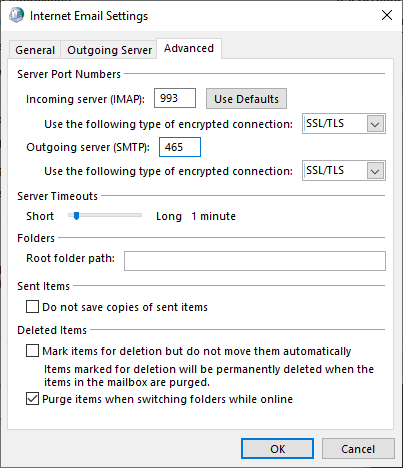
Then click on the Advanced tab in the same window. Here, all you need to do is set the port numbers and encrypted connection types as I have them, then click OK.
This will take you back to the add account page from before, where you can now click Next.
Outlook will now test your connection settings to the email address, and everything should pass. If you encounter any errors, that means something was not configured correctly as outlined in the previous steps. Also, make sure things like the mailbox name and its password are correct. You can test your mailbox credentials via our webmail client.
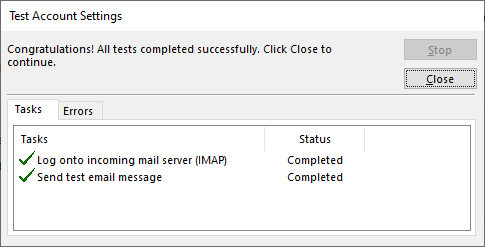
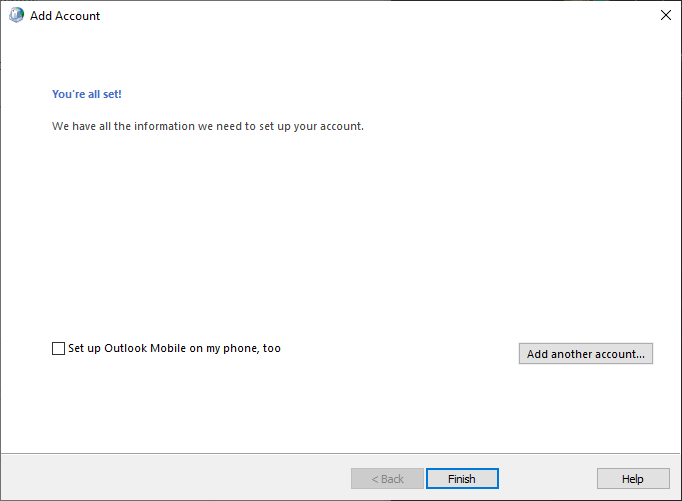
Once you confirm that it succeeded, you can click Close. In the next window, it will confirm the process is completed.
Note: I recommend leaving the mobile phone setup option box unchecked, as that process is different and better addressed in another guide (if needed). Click Finish.
Now, we are back where we started, and you should see the new profile setup. You can repeat the process to add additional email profiles for more addresses. Otherwise, click OK to close the window.
Note: Again, if you have more than one profile, choose to enable the "Prompt for a profile to be used" option before clicking OK if you haven't already set that.
And that concludes how to setup a Opalstack email for Outlook on Windows. Let us know if you have any questions. We hope this helps!
